The first thing you should do is prepare the subfloor for the laminate flooring. This can be done by using an installation kit, which costs around $20. After that, you need to check the moisture levels before installing the flooring. You can use spacers to make sure the flooring is level. Once the subfloor is prepared, you can begin installing the laminate floor. You can follow the steps listed below to install the floor.
Installation kits cost $20
Laminate flooring can be expensive, especially if you do not have any experience installing it. Most laminate floors require professional installation and can run between $2 and $7 per square foot. These prices depend on the size of the room and the amount of customization required to install the flooring. A room that has an unusual shape and other unique features will cost more to install than a standard room. Also, if you plan on adding extra features to your laminate flooring, you can expect to pay more for it.
When installing a laminate floor Dubai, you can use specialized tools to install it properly. Installation kits for laminate flooring cost $20 and come with everything you need to install your new floor. The kit also includes the tools you need to install the flooring. The best tools to use for the installation are a pry bar, a measuring tape, a level, and a hammer. Installation kits can also come with spacers to keep the laminate floor away from walls.
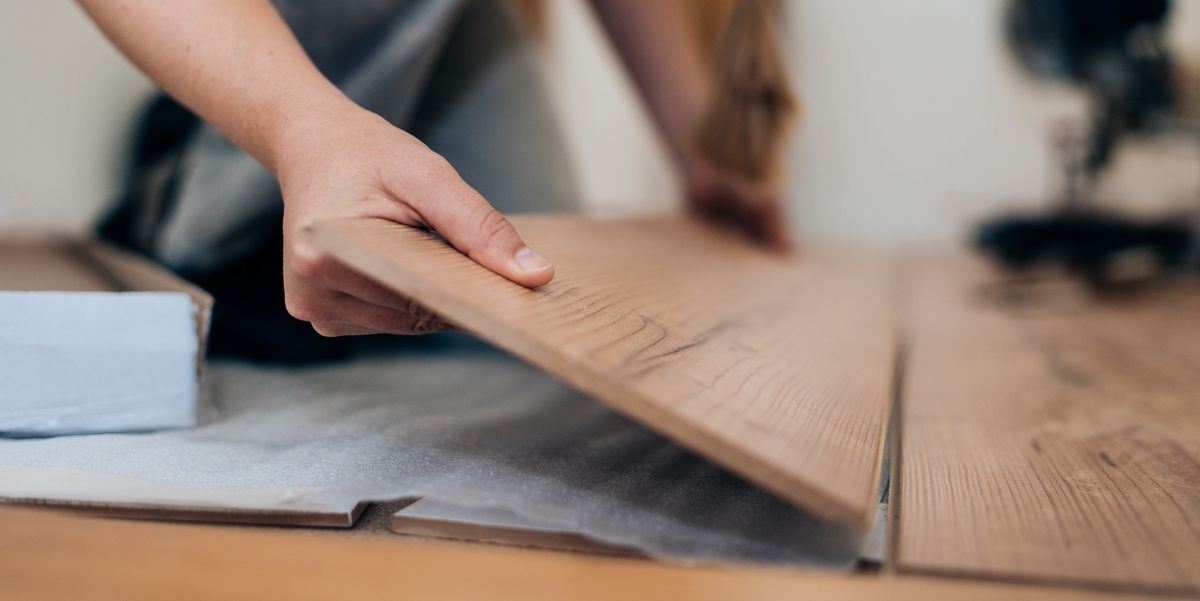
Preparing subfloor for laminate flooring
In order to properly install laminate flooring, the subfloor must be smooth and clean. It may be necessary to remove the previous floor covering. However, it’s not necessary to remove everything. Laminate flooring will float over the subfloor, so you’ll have to make sure it’s flat and level. You’ll also need to ensure that the subfloor meets the manufacturer’s moisture requirements, or it will void the warranty.
If you have a concrete subfloor, you need to make sure it’s level. If necessary, you can cover it with a self-leveling screed or repair it with mortar. Ensure that there are no high spots or residues on the floor. Then, use a primer to ensure that the self-leveling compound adheres properly to the floor. Be sure to allow enough time for the surface preparation before laying the laminate.
Checking for moisture levels before installing laminate flooring
Before you install your new laminate floor, it is important to check for moisture levels on the subfloor. Wood and concrete subfloors have different moisture levels, and if you skip this step, you may end up with a floor that is prone to cracking, buckling, and peaked seams. Moreover, moisture can cause the tongue and grooves on your flooring to break and the floor to expand and contract. So, it is recommended that you allow your new subfloor to dry for at least 60 days before installing your new floor.
You can also install hardwood flooring over your subfloor if you want. However, if you are unsure of the level of moisture in the subfloor, you can use a moisture meter to make sure you’re installing a new floor over a suitable substrate. The humidity and moisture content of the subfloor must be between four and eight percent. If you notice any high or low readings, they should be interpreted as signs of a moisture problem and remedial action should be taken.
Using spacers
Using spacers is an important part of the installation process. Using the wrong ones can lead to a messy joint or shift the pieces around. Spacers are half-inch strips of flooring that should be placed along the walls where pieces are being tapped into place. These spacers prevent the next row from grabbing the row before it. Once the flooring has been installed, spacers can be removed.
These plastic wedges help maintain expansion spacing around the edges of the floor and wall during the installation process. They help minimize floor movement and prevent buckling of the planks. Typically, spacers come in bags of 30 or more. You can find spacers at any store that sells laminate flooring. The expansion gaps should be three-eighths of an inch. It’s important to use spacers in every room in your home to avoid buckling of plank floors.
Calculating square footage
To calculate the total square footage of a room, measure the length and width of each room, and multiply the figures. Also, make sure to account for door and skirting frames. If the room is irregularly shaped, you may need to order additional boards or panels to cover the area. Finally, multiply the total square footage by the price of the laminate flooring to calculate the cost of the material. This is an important step in ensuring the quality of your finished floors.
The cost of laminate flooring varies, but it’s generally not expensive when compared to other types of flooring. The price of a flooring job can vary greatly, so it’s important to get multiple quotes. Some companies may be willing to cut their prices if they get the job. Be sure to factor in overage when you’re estimating the cost of your job. By doing this, you can get an accurate estimate of the costs of the flooring, including underlayment.
Using crowbars
There are many techniques you can use to properly install your laminate flooring. The first one is using a pull bar to push the pieces into place. Next, you’ll need to use a flooring hammer to remove any spacers. Be careful not to push the spacers into the flooring as they may chip the edges of your new floor. After that, you’ll want to use a nail gun to secure the baseboards. Make sure they’re level but pressed down to ensure consistent spacing between the pieces.
When you’re installing a row of laminate flooring, make sure there’s a gap between the two pieces. This will allow the flooring to expand and contract. Then, place the first row of planks against the longest wall in the room, and then use the hammer to tap the next row into place. Using a jigsaw or crowbar, you can make an odd cut.